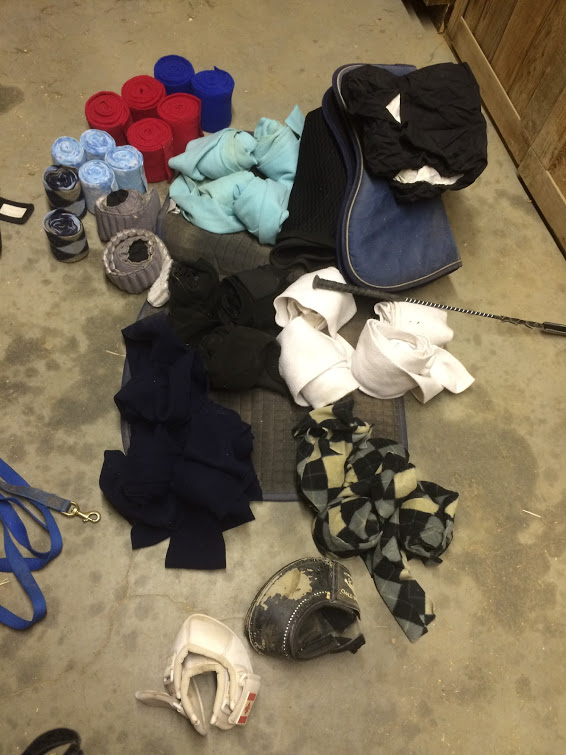
Let's wrap this up nice and tight: First I had a
Teach Me Tuesday about bandage liners, then I bought some and had a friend teach me
how to use them. I got a couple of requests for a tutorial, but since at that point, I had officially done like one liner-wrap by myself, I thought I'd better wait. NO LONGER!! Here is your official Sprinkler Bandit's how-to of bandage liners for exercise wraps.
First off:
Supplies!
You will need a normal set of fleece polos and your choice of liners. My favorite set up right now is to use Centaur polos (
$16.95 from Riding Warehouse) and I go back and forth between my Roma channel quilted leg pads (
$13.99 from Horseloverz) and Eskadron climatex bandage liners (
$47.95 from Smartpak).
If you don't have liners yet, let me break it down for you.
Here are the Romas:

The only color option I've found is white. This is the 12" model and it's 18" long. As you can see, it's a rectangular shape with hard corners. These are mildly harder to wrap into your bandage. The material definitely has two different sides, but it's hard to tell which one is supposed to go next to the horse because they look the same. (hint: it's the towel-y side, not the soft flannel-ish side).

Here are the Eskadrons:
I got these used off of facebook and was told they were the 10.5" model. Here is what I can tell you: either they stretch like a SOAB or they are the 12" model. They are slightly bigger than the Romas. They are also softer. The inside/outside delineation is clearer, and the lack of hard corners makes wrapping about 30% easier.
Does that 30% justify the extra $30 in cost? Your call. (My vote: buy these used for the same price as Romas new. They really are better.)
NEXT
The process.
Of course, I decided to take pictures for this tutorial now that it's dark at 5pm and the aisle lights went out in the barn. Thus, pictures were taken while it was 9f in the indoor. My apologies.
Next off.

Here is what we need to wrap one leg:
One bandage liner.
One neatly-rolled polo wrap.
One bad flash photography job not required.

Go ahead and roll the liner like a standing bandage--outside rolls against itself, like so:
Then lay the edge of the liner against the inside of your horse's cannon bone and wrap to the end of the liner.

This is not a contest to see how tight you can get it. If anything, I go a little looser than a standing bandage. You don't want them to slide down, but this IS NOT a pressure wrap.
 |
| even harder? photographing this moment |
Now here's the tricky part.
While holding the liner in place with one hand, start the polo wrap. You want to start dead center on your liner. Just like with regular polos, do a wrap, then a second wrap over the top to anchor your bandage.
 |
| yup had to straighten this up after i took the pic |
Now your liner is starting to stay in place by yourself, but keep one hand gently on the liner and polo until it is fully stable. You don't want it to twist/bind on the leg.
If your anchor wrap is solid, the rest is pretty easy.
On Courage (medium bone, 16.1h OTTB), I do the anchor, then one wrap below, then do the cradle on his fetlock, then work back up. It is important to wrap under the fetlock to secure your liner and keep dirt out of the wrap.
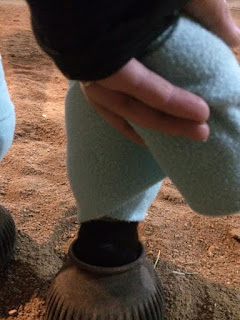
This picture I actually wrapped a little too low, but I was using one hand and it was bloody cold. Back off, ok?
You want to make sure the liner is covered at the bottom. If you used the Romas, this is when you swear a little because those stupid corners are really hard to wrap in. If you used the Eskadrons, pat yourself on the back.
I've always been taught to do a loop around the fetlock, then an anchor straight across, then another loop around the fetlock and head back up the leg. If you also wrap this way, STOP. One pass under the fetlock, then wrap in nice, even rolls up the cannon bone.

Now you're at the top of the cannon bone/liner. Most likely, you are very close to your horse's knee. There are two ways to finish this wrap. The first way I was taught produces a very clean finish and keeps the bandage very tidy.
This way entails making sure your liners finish RIGHT BELOW the knee joint when you first put them on. If you wrapped this way, you take your last pass around the liner and overlap aboue 1/4-1/2" of polo over the top of the liner material.
Your result is very polished and correct in any company.
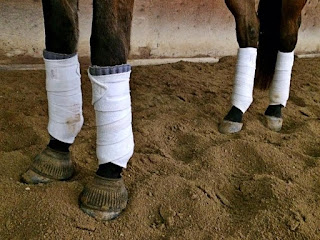
OR
You may want to let the whole world know how trendy you are, that you have liners, or that you're totally copy-catting all those trendy-cool-strange horses you see in pictures on the internet. This entails letting your liners finish a little higher on the knee when you first wrap them, then wrapping up to the bottom of the knee with your polos and finishing about 1/2" below the top of your liners.
I've done it both ways. I would NOT recommend the second method for the roma liners--again the hard corners are not your friend here. It looks fine on the eskadrons. I guess it's just a matter of preference--I like the tidier finished top for lessons and clinics and daylight, but if it's pitch black at 5pm and I'm the only one at the barn, HELLZ YEAH we're gonna pretend we're Euro dressage stars.
 |
| liners peek out |
 |
| liners covered up |
So there you have it. Two methods to wrap bandage liners. Who else is in love with the look? (And frankly, the function too. This at least doubles, probably triples the amount of interference protection a polo provides, plus the added benefit of protecting the leg from the polo. So much win.)